User Manual
Complete documentation for Bento Generator Pro | Version 1.0
🎬 Video Tutorials Available
Learn faster with our step-by-step video tutorials on YouTube
Watch Tutorials →Introduction
Bento Generator Pro is a powerful After Effects plugin that creates stunning bento grid layouts with just a few clicks. Whether you're creating social media content, presentations, or video projects, this plugin helps you design professional grid layouts with animations and footage integration.
⚡ Real-time Preview
See changes instantly
📐 Flexible Grids
1-13 sections
✨ Animations
Pop, Slide, Radius
🎬 Footage
Media integration
💾 Presets
Save configurations
🎨 Background
Custom colors
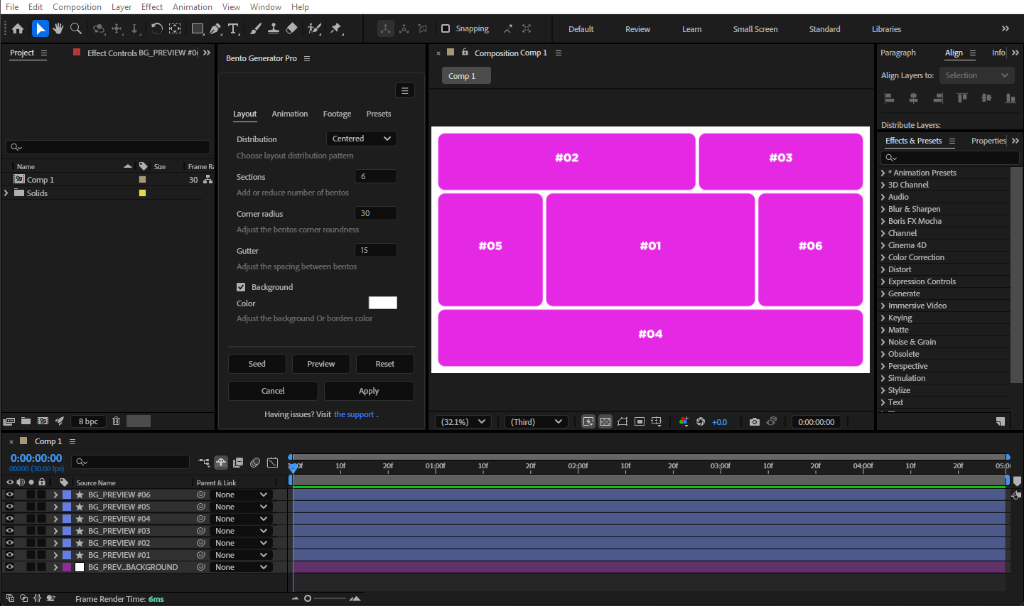
Bento Generator Pro - Live Preview in After Effects
System Requirements
| Component | Requirement |
|---|---|
| Application | Adobe After Effects CC 2019 or later |
| Operating System | Windows 10/11 or macOS 10.14+ |
| RAM | 8GB minimum (16GB recommended) |
| License | Valid license key required |
Installation
Windows
Close After Effects
Ensure After Effects is completely closed.
Copy the Plugin
Copy Bento Generator Pro.jsx to:
Open Plugin
Restart After Effects and go to Window → Bento Generator Pro.jsx
macOS
Close After Effects
Ensure After Effects is completely closed.
Copy the Plugin
Copy Bento Generator Pro.jsx to:
Open Plugin
Restart After Effects and go to Window → Bento Generator Pro.jsx
Important: Enable "Allow Scripts to Write Files and Access Network" in Edit → Preferences → Scripting & Expressions
License Activation
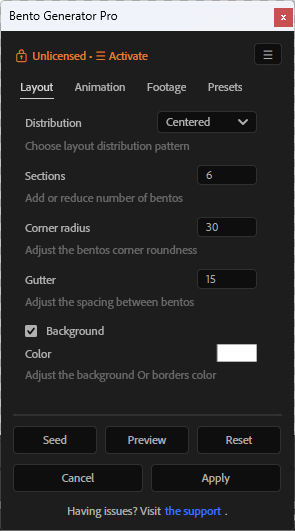
Unlicensed State
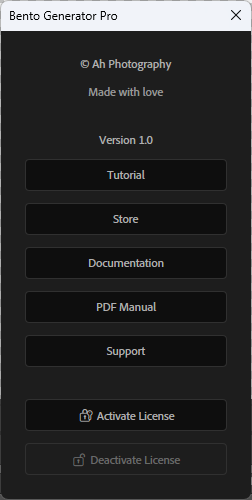
Activate License Menu
To Activate:
- Click the Menu (☰) button
- Click Activate License
- Enter your 16-digit license key (format: XXXX-XXXX-XXXX-XXXX)
- Click Activate
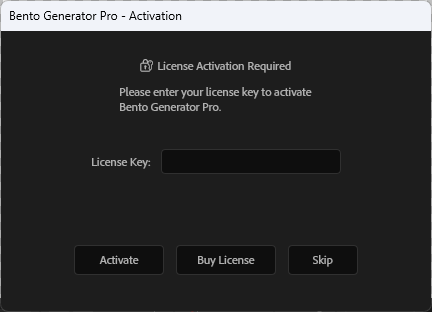
License Activation Dialog
To Deactivate (Transfer Device):
- Click the Menu (☰) button
- Click Deactivate License
- Confirm the deactivation
- Install and activate on your new device
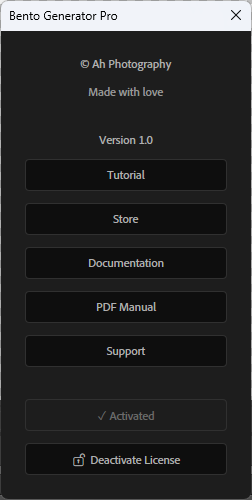
Activated State - Full Access
User Interface
Header
• Lock Message: Shows "🔒 Unlicensed • ☰ Activate" when not activated
• Menu Button (☰): Access tutorials, support, and license options
Tabs
• Layout: Grid settings and background color
• Animation: Animation type and timing
• Footage: Assign media to grid sections
• Presets: Save and load configurations
Action Buttons
• Seed: Generate new random layout
• Preview: Create temporary preview
• Reset: Reset to defaults
• Cancel: Remove preview
• Apply: Finalize and create precomps
Layout Tab
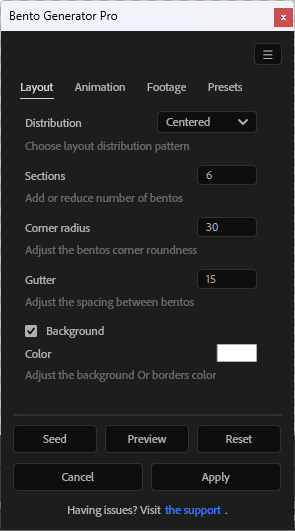
Layout Tab - Grid Settings
| Setting | Description | Range |
|---|---|---|
| Distribution | Random or Centered pattern | - |
| Sections | Number of grid sections | 1-13 |
| Corner Radius | Roundness of corners | 0-150 |
| Gutter | Spacing between sections | 10-60 |
| Background | Add solid color layer | Checkbox + Color |
Animation Tab
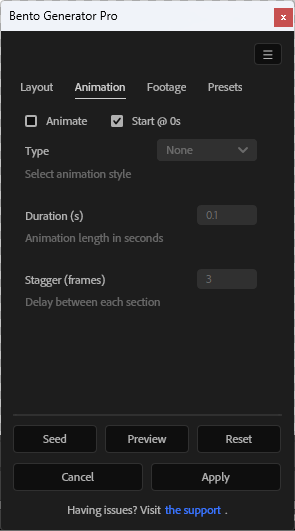
Animation Tab - Motion Settings
Animation Types
None
No animation
Pop
Scale with bounce
Slide
Slide from edges
Radius
Corner animation
| Setting | Description |
|---|---|
| Animate | Toggle animations on/off |
| Start @ 0s | Begin at timeline start |
| Type | Animation style selection |
| Duration (s) | Animation length in seconds |
| Stagger (frames) | Delay between sections |
Footage Tab
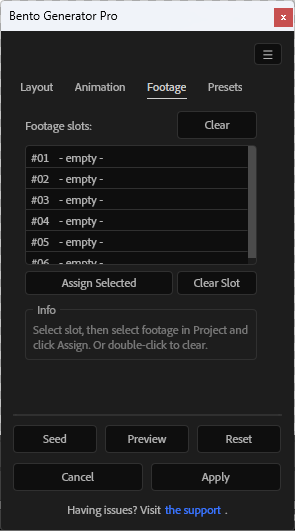
Footage Tab - Media Assignment
Assigning Footage
- Click on a slot in the list (e.g., #01 - empty)
- Select footage in the Project panel
- Click Assign Selected
- Footage appears in preview immediately
Double-click a slot or use Clear Slot to remove footage.
Footage is automatically aspect-filled (cropped to fit the section).
Presets Tab
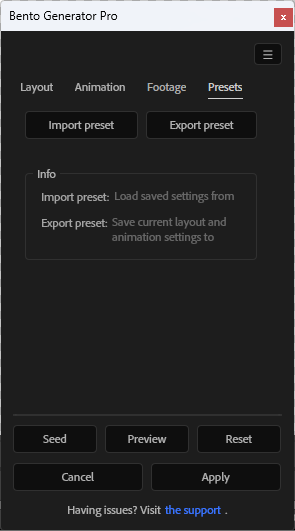
Presets Tab - Save & Load
Export Preset
- Configure your desired settings
- Click Export preset
- Choose location and filename (.bgpreset)
Import Preset
- Click Import preset
- Select a .bgpreset file
- All settings are restored
Menu Options (☰)
Menu Dialog - All Options
| Option | Description |
|---|---|
| Tutorial | Opens YouTube tutorials |
| Store | Visit Adobe Exchange store |
| Documentation | In-app help dialog |
| PDF Manual | Opens detailed guide |
| Support | Contact for help |
| Activate License | Enter license key (shows ✓ Activated when licensed) |
| Deactivate License | Transfer to another device |
Workflow Guide
Create Composition
Create or open a composition in After Effects
Adjust Layout
Set sections, radius, gutter in Layout tab
Preview
Click Preview to see the grid in your composition
Randomize
Click Seed to try different layout variations
Add Animation
Configure animation settings if desired
Assign Footage
Add your media in the Footage tab
Apply
Click Apply to finalize and create precomps
Example Result
After applying, your footage is automatically organized into beautiful bento grid layouts with precomps ready for further editing.
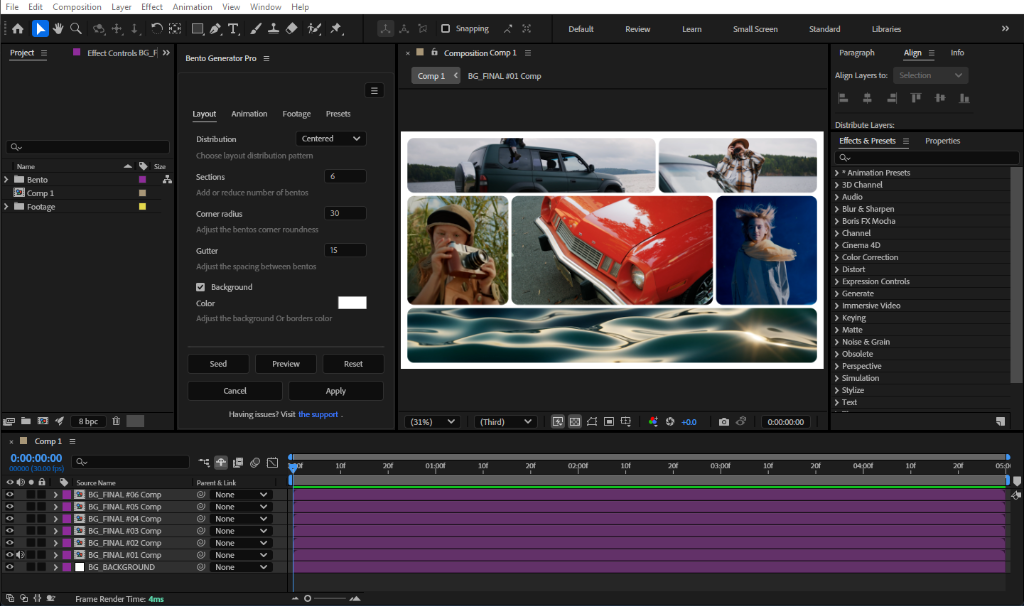
Final Result - Bento Grid with Applied Footage
Troubleshooting
| Issue | Solution |
|---|---|
| "No active composition" | Create or open a composition first |
| Footage not showing | Click Preview first, then assign footage |
| Animation not playing | Enable Animate checkbox in Animation tab |
| Plugin not in menu | Check installation path and restart AE |
| License invalid | Check format: XXXX-XXXX-XXXX-XXXX |
License Information
Per-User License (2 Devices Max)
This plugin is licensed per user. You may install on up to 2 devices simultaneously.
Need a 3rd device? Deactivate from an existing device first via Menu ☰ → Deactivate License.
Permitted:
- ✓ Install on up to 2 personal devices
- ✓ Use for personal and commercial projects
- ✓ Transfer license via Deactivate/Activate
Prohibited:
- ✗ Share or redistribute license keys
- ✗ Modify or reverse engineer the plugin
🔒 Privacy Policy
We do NOT collect, use, store, rent, or sell any user data through using our Plugin.
The plugin operates entirely offline - your projects and data stay private on your machine.